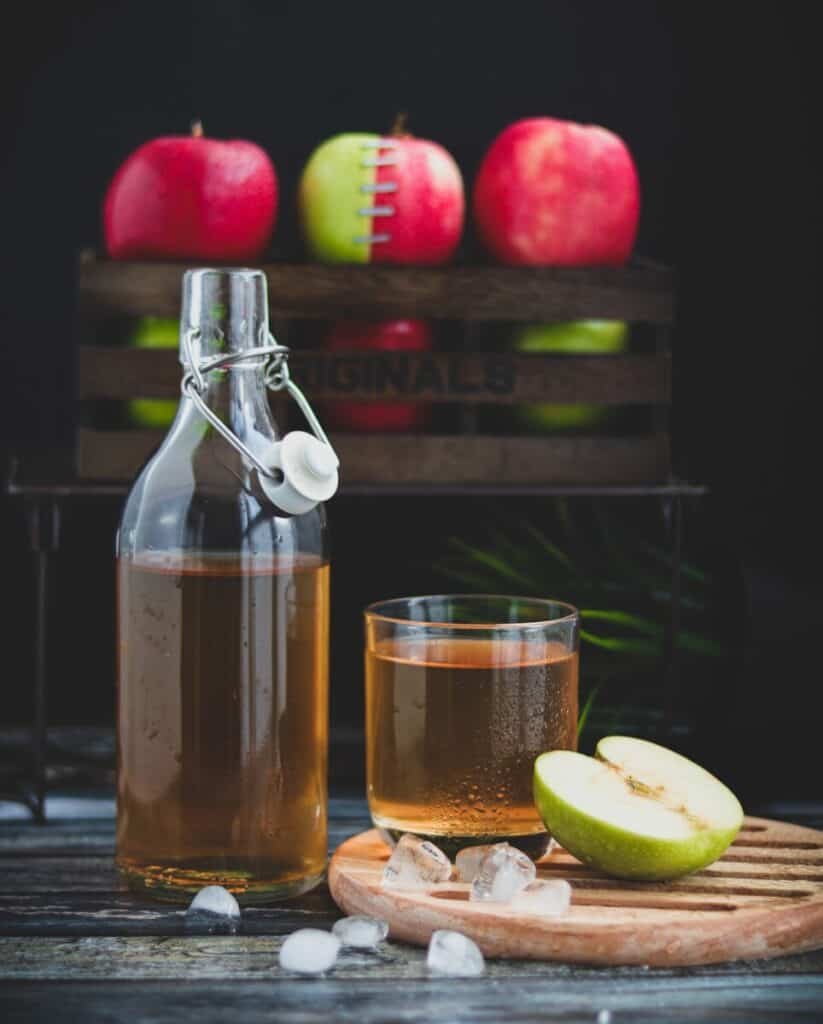
How do I Make Hard Cider?
Some of the simplest brew days I have had was by making hard ciders. No mashing. No boiling. Just clean and sanitize equipment, mix my ingredients together, close the lid, throw on an airlock, and away it goes in a closet (or my fermentation chamber) to ferment.
But what ingredients do I need to make hard cider?
There are several ways to go about making cider, so I’ll share two of the routes I take:
But before we get to the ingredients, what equipment do I need?
Equipment needed for Cider Making
Here are some of the items you’ll need to start fermenting cider:
- Fermenter or carboy
- This vessel should be larger than the total volume of liquid you are using. For example, for 5 gallons of cider, use a bucket fermenter that is at least 6 gallons in volume. This allows the foam from yeast, known as krausen, to rise without spilling out of the fermenter.
- Here’s an example of a 6.5-gallon bucket fermenter
- Airlock
- This can be as simple as some silicone or vinyl tubing with the end placed in a jar of water or sanitizer or an S-type or 3-piece airlock.
- Depending on your fermenter choice, you may need an additional bung or stopper with a hole.
- Long-handled stainless steel or plastic spoon
- Hydrometer and testing jar to measure the specific gravity of cider before and after fermentation to determine alcohol content.
Method #1: Hard Apple Cider from Apple Juice
Using store-bought apple juice or apple juice from concentrate are easy ways of producing hard cider. For a typical 5-gallon (19 L) batch, you’ll need:
- Five (5) gallons of apple juice
- Make sure the apple juice does not contain preservatives like sodium benzoate, potassium sorbate, or nitrites, as these will inhibit the yeast from fermenting the juice
- Yeast
- I’d recommend a wine or champagne yeast, a neutral ale yeast, or a yeast specific for ciders.
- Wine yeast: Red Star Côte des Blancs or Lalvin 71B
- Champagne yeast: Lalvin EC-1118
- Ale yeast: Lallemand Nottingham, Fermentis SafAle US-05, and Safale S-04 have produced good results for me
- Cider yeast: Wyeast 4766 Cider or Brewer’s Best Cider House Select Premium Cider Yeast
- I’d recommend a wine or champagne yeast, a neutral ale yeast, or a yeast specific for ciders.
- Yeast nutrient
Take a sample of the apple juice to determine the original gravity (OG)–do this by pouring some juice in the hydrometer testing jar, place the hydrometer in the jar, and then take a reading. This will probably be around 1.050 SG.
Into a clean and sanitized fermenter, combine the apple juice, yeast nutrient, and yeast. Place the airlock into either a bung/stopper (for a carboy) or in the grommeted lid (bucket fermenter), and fill the airlock with sanitizer, water, or vodka–whatever works for you.
Place the fermenter in a cool, dark place. If you have control over the temperature–for example a refrigerator connected to a thermocouple, make sure the temperature is set within the range of the yeast manufacturer’s recommendation.
Let the juice ferment for a while. Patience is key, here. After about 1 week, you can carefully take a sample of the cider, using a sanitized siphon and tubing or a wine thief. Take a reading and record this measurement. Repeat this process in two days. If the readings are the same, you’re ready for packaging!
If you have kegs, this is really easy. If not, bottling isn’t difficult, so don’t worry! I have more information for you below for both.
Method #2: Hard Cider from Extract Kit
An example of a cider recipe kit that I’ve used several times is from Brewer’s Best Cider House Select line. I’ve made the Strawberry Pear cider and Mixed Berry cider.
These kits are for 6-gallon batches. Per the directions, you’ll also need to use 2 lbs corn sugar (dextrose), though I’ve substituted this with normal table sugar and had good results, so, do whatever is easiest for you!
So, here’s what you’ll need to make cider from one of these kits:
- Corn sugar or table sugar – 2 lbs (~900 g)
- Cider recipe kit (items included below)
- Juice concentrate
- Flavor sachet
- Yeast sachet
- Sweetener sachet
- Two (2) gallon or larger pot to dissolve the sugar in 1 gallon (3.8 L) of water
- Chlorine-free water, enough to make 6 gallons of finished cider
- See my article on brewing water for more information on water and why you want to remove chlorine before fermentation
To get started, bring one gallon of water to a boil. Remove the pot from the heat, and slowly add the sugar, making sure to thoroughly stir to dissolve. Bring the water back to a boil and boil for 10 minutes. Remove from heat, cover, and allow this to cool.
To a clean and sanitized fermenter, add the juice concentrate and flavor sachet. Add the sugar-water mixture to the fermenter. Top off the fermenter with enough water to reach a volume of 6 gallons (23 L). Add or “pitch” the yeast and the sweetener sachet into the fermenter and seal the fermenter with a lid and airlock.
Place the fermenter in a cool, dark place.
Let the cider ferment for a while. Patience is key, here. After about 1 week, you can carefully take a sample of the cider, using a sanitized siphon and tubing or a wine thief. Take a reading and record this measurement. Repeat this process in two days. If the readings are the same, you’re ready for packaging!
If your kit comes with a flavor sachet, add this to the fermenter, stir well with a sanitized spoon, then let the fermenter sit for another 48 hours.
Now on to packaging!
Packaging: Carbonation and Sweetness
There are a few questions to ask at this point:
- Do you want your cider to be still (flat) or carbonated (bubbly/fizzy)?
- Do you want your cider to be dry (not sweet) or sweet?
Bottling
Dry, Still Cider
If you want your cider to be still and dry, this is easy! To clean and sanitized bottles, simply add cider until there’s approximately 1 inch of headspace. Use a bottle capper and crown caps to seal the bottles.
Sweet, Still Cider
If you like sweet but still cider, add a non-fermentable sugar like erythritol, xylitol, or lactose to the cider before filling the bottles.
Dry, Sparkling Cider
In order to get those fizzy bubbles, we’ll need to allow the yeast in the cider to ferment a simple sugar to generate carbon dioxide (CO2). Before bottling, add a solution of corn sugar or table sugar in water to the cider. To clean and sanitized bottles, simply add cider until there’s approximately 1 inch of headspace. Use a bottle capper and crown caps to seal the bottles.
Alternatively, instead of adding a sugar solution to the cider, you can use a product such as Carbonation Drops. Simply add one carbonation drop to each 12 oz bottle (or 2 drops for 22 oz bottles) and then fill each bottle with cider.
Sweet, Sparkling Cider
For a sweet, bubbly cider, add a non-fermentable sugar like erythritol, xylitol, or lactose to the cider, along with a solution of corn sugar or table sugar in water. The yeast will ferment the corn sugar or table sugar and leave the other sweeteners alone.
Kegging
Dry, Still Cider
If you want your cider to be still and dry, this is easy! To a clean and sanitized keg, simply add cider to the keg. For serving, you will want to have low CO2 pressure (1-4 psi) to minimize the carbonation of the cider.
Sweet, Still Cider
If you like sweet but still cider, add a non-fermentable sugar like erythritol, xylitol, or lactose to the keg before filling it with cider. For serving, you will want to have low CO2 pressure (1-4 psi) to minimize the carbonation of the cider.
Dry, Sparkling Cider
In order to get those fizzy bubbles, we’ll need to do one of two things:
- Allow the yeast in the cider to ferment a simple sugar to generate carbon dioxide (CO2).
- Force CO2 into solution by the use of pressure.
If going with natural carbonation (Option 1), add a solution of corn sugar or table sugar in water to the keg. Then fill the keg with cider. Leave the keg somewhere dark and cool (room temperature) for 1–2 weeks to carbonate. After the cider has had time to carbonate, set your keg up with your serving system, chill the cider, and enjoy a fresh pint of cider!
In order to force carbonate (Option 2), fill a clean and sanitized keg with cider. Chill the cider to serving temperatures—I prefer 5 to 7 °C (41 to 45 °F). Connect a gas line from your CO2 regulator with the pressure set to approximately 15 to 20 pounds per square inch (psi) for a medium-high carbonation level in your cider. Leave the cider for 7 to 10 days to carbonate. After the cider has had time to carbonate, set your keg up with your serving system, chill the cider, and enjoy a fresh pint of cider!
Sweet, Sparkling Cider
For a sweet, bubbly cider, we can follow a similar procedure for kegging a dry, sparkling cider.
For Option 1, add a non-fermentable sugar like erythritol, xylitol, or lactose to the cider, along with a solution of corn sugar or table sugar in water. The yeast will ferment the corn sugar or table sugar and leave the other sweeteners alone. After 1–2 weeks, you’ll be enjoying sweet, sparkling cider!
For Option 2, add a non-fermentable sugar like erythritol, xylitol, or lactose to the cider, and follow the rest of the directions for force carbonating. Leave the cider for 7 to 10 days to carbonate. After the cider has had time to carbonate, set your keg up with your serving system, chill the cider, and enjoy a fresh pint of cider!
Alternative Backsweetening post packaging
Another way to end up with a sweet cider, whether still or carbonated, is to add sugar or syrup to the cider right before drinking! Things like honey, maple syrup, fruit purées or syrups make this easy and you can simply add however much you want to get the flavor you’re after.
Choose Your Own Adventure
The path is wide open when venturing into the world of hard ciders. While apple juice is an excellent base, why not trying to add other fruits or juices like cherries, strawberries, pear, pineapple, etc.? Or add honey to make a cyser? Try using different yeasts to bring out different flavors.
The possibilities are truly endless. Enjoy the fruits of your labor (and easy brew days)!
Suggested products
Here is a list of some of the items I mentioned in this article. The following table contains affiliate links where I may earn a small commission if you make a purchase using the provided links. This helps support the blog. I appreciate your support!
Equipment
| Item | Link |
|---|---|
| 6.5 gallon bucket fermenter | Find at Amazon |
| S-type airlock | Find at Amazon |
| 3-piece airlock | Find at Amazon |
| Hydrometer | Find at Amazon |
Ingredients
| Item | Link |
|---|---|
| Red Star Côte des Blancs | Find at Amazon |
| Lalvin 71B | Find at Amazon |
| Lalvin EC-1118 | Find at Amazon |
| Lallemand Nottingham | Find at Amazon |
| Fermentis SafAle US-05 | Find at Amazon |
| Fermentis SafAle S-04 | Find at Amazon |
| Brewer’s Best Cider House Select Premium Cider Yeast | Find at Amazon |
| Fermaid O yeast nutrient | Find at Amazon |
| Diammonium phosphate (DAP) | Find at Amazon |
| Carbonation Drops | Find at Amazon |
Kits
| Product | Where to Buy? | |
|---|---|---|
 | Apple Cider Kit (Cider House Select) | Find at Amazon |
 | Cherry Cider Kit (Cider House Select) | Find at Amazon |
 | Cranberry Apple Cider Kit (Cider House Select) | Find at Amazon |
 | Peach Mango Cider Kit (Cider House Select) | Find at Amazon |
 | Pear Cider Kit (Cider House Select) | Find at Amazon |
 | Pineapple Cider Kit (Cider House Select) | Find at Amazon |
 | Raspberry Lime Cider Kit (Cider House Select) | Find at Amazon |
 | Spiced Apple Cider Kit (Cider House Select) | Find at Amazon |
 | Strawberry & Pear Cider Kit (Mangrove Jack’s) | Find at Amazon |
Featured photo by: Ehioma Osih
Pretty great, thanks! For the natural carbonation method, how much of the fermentable sugar should be added?
Excellent question! Here are some values for different carbonation levels. Note: this is for total volume of cider, so if you have 19 liters or 5 gallons, multiply the value below by the total volume: e.g., 4.5 g/L x 19 L = 85.5 g of sugar.
For low carbonation, 4.5 grams per liter (g/L) or 0.6 ounces per gallon (oz/gal) table sugar; medium carbonation, 6 g/L or 0.8 oz/gal; high carbonation 11 g/L or 1.5 oz/gal.
There are some nice calculators online. Here’s one I like from Brewer’s Friend: https://www.brewersfriend.com/beer-priming-calculator/
Cheers!